
Join The Founder's Inbox
Join 13k+ entrepreneurs and receive tutorials, tips, and strategies for building smarter digital products using no-code, AI, and automation.

Learn how to automate Webflow CMS item creation and updates using Airtable and Make.com. This step-by-step guide will show you how to streamline your workflow with custom API calls and Airtable webhooks.

Keeping your Webflow CMS updated manually can quickly turn into a headache, especially when your project grows. The good news? Automating the process is easier than you think. By using Airtable and Make.com , you can automate the creation and updating of CMS items, making sure everything stays up to date without constant manual work.
In this guide, I’ll show you how to set up a workflow that triggers CMS updates when records are created or changed in Airtable. This setup will save you time and ensure that your Webflow CMS runs smoothly — all without lifting a finger.
Here’s what we’ll cover:
Let’s jump into how to set this up!
Learn how to streamline Webflow workflows with Make.com and Airtable—save time and scale effortlessly.


The first step in this workflow is triggering the automation via an Airtable Webhook . I’ve written a detailed article on how to instantly trigger Airtable workflows using webhooks in Make.com . Essentially, a webhook in Airtable sends data to Make.com whenever a change occurs (e.g., a new or updated record). For those who are just getting started, you can check out my Airtable affiliate link to learn more about this tool.
In this case, the webhook triggers the workflow and sends the Airtable Record ID as a URL parameter to be used in the next step.

Once the workflow is triggered, the next step is to retrieve the Airtable record using the record ID that was passed through the webhook in Step 1. Make.com connects to Airtable, grabs the record, and brings in all the field data that’s needed to create or update the Webflow CMS item. If you're curious about the best practices for mapping fields, check out my article on The Complete Guide to Mapping Airtable Fields in Webflow .

This step is crucial because Webflow’s API expects data to be formatted as JSON . In this step, we’ll create the necessary JSON that holds all the field data from Airtable, ready to be sent to Webflow.
I’ll break this down in more detail because it's essential to get the formatting right. For example:
For more flexibility, using Make.com allows you to manage these API calls efficiently and automate more complex workflows.
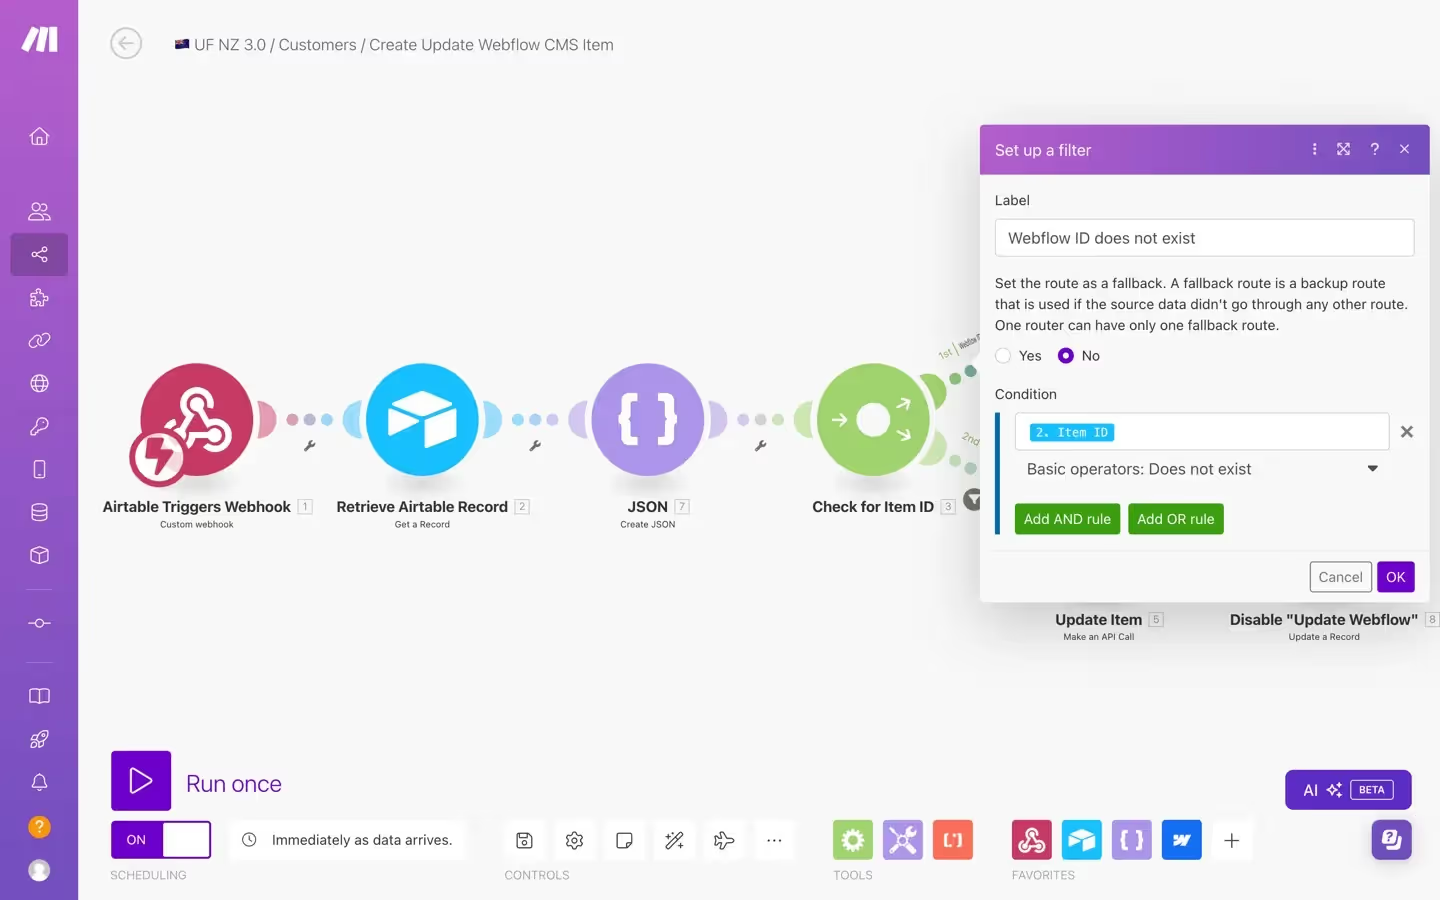
Here’s where things get efficient. We use a router step to check whether the item already exists in Webflow by looking for the Webflow ID in Airtable. If the item already has a Webflow ID, the workflow will proceed with an update. If it doesn’t, a new item will be created.
This way, both create and update operations happen within the same workflow, reducing the need for separate processes. If you're new to Webflow, I highly recommend signing up via my Webflow affiliate link .

If the Webflow ID does not exist, the workflow triggers the Create Item action. I prefer using a custom API call rather than Make.com ’s native create/update item module because it provides more flexibility.
For example, the native module doesn’t allow you to map certain field types like single-option fields, which can be mapped easily in a custom API call. This way, any changes made to the JSON apply to both the create and update steps.

Once the new Webflow item is created, the workflow stores the Webflow ID and Slug back into Airtable. This ensures that future updates can reference these fields, allowing the workflow to know whether to update or create a new item next time the workflow runs.

If the Webflow ID is found in Step 4, the workflow proceeds with an Update operation instead of creating a new item.

This step uses the Update Item action. The JSON created in Step 3 is passed to Webflow, updating the relevant fields for the existing item.

After updating the Webflow item, the final step in the workflow is to uncheck a checkbox field in Airtable called "Update Webflow." This is a simple toggle that you can use to control whether or not an update should be triggered in the future. Once unchecked, it prevents the workflow from running unless another update is required.
Join 13k+ entrepreneurs and receive tutorials, tips, and strategies for building smarter digital products using no-code, AI, and automation.
By combining both create and update steps into one workflow, you can save time and reduce complexity in managing Webflow CMS items based on Airtable data. This method is flexible, efficient, and scalable for large databases.
If you’re interested in setting this up yourself, be sure to follow the detailed steps outlined above. Also, if you're a non-technical founder looking to build your MVP using no-code tools like Webflow, Airtable, and Make.com , check out my community MVMP Labs . In it, I provide courses like creating a landing page engine using Webflow CMS, Airtable, and Make.com .
In most cases, yes.


